Shingoの数学ノート
プログラミングと機械学習のメモ
BERTを使ってみよう2
日付: カテゴリ: 自然言語処理
前回と今回で、BERTの理論と実装について紹介したいと思います。
今回は、BERTの実装について説明していきます。
BERTの理論を知りたい方は前回のブログを参照してください。
実際のコードはgithubに上げてありますので、そちらも参考にしてください。
実行環境の準備
ローカルにNVIDIAのGPUを載せている人は多くはないと思うので、 実行環境はgoogle colaboratoryを想定しています。
その場合ランタイムはGPUにしてください。
また、trainingには以前紹介したyahoo locoのレビューデータを使用します。 まだ取得していない方はこちらの記事を参考に取得してください
この記事では、東京のレビューデータ「review_df_yahoo_tokyo.csv」を使用しています。
以下のようにファイルをアップロードしてください。

モジュールのインポート
以下をインポートします。
import numpy as np
import pandas as pd
from tqdm.notebook import tqdm
import torch
from sklearn.model_selection import train_test_split
import torch.optim as optim
import torch.nn as nn
import torch.nn.functional as F
# transformersをインストール
!pip install transformers
!pip install mecab-python3==0.996.2 fugashi ipadic
from transformers import BertJapaneseTokenizer, BertModel
準備で上げたデータセットを加工して使用します。
今回はlabelをRating > 3ならpositive、Rating < 3ならnegativeとしています。Rating==3は使用しません。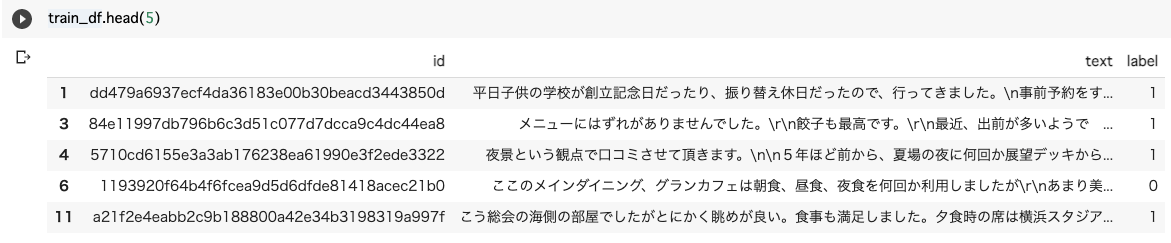
tokenizer
まずは、tokenizerを定義します。学習済みモデルは、 'cl-tohoku/bert-base-japanese'を使用します。
# tokenizerの定義とvocabの辞書
model_name = 'cl-tohoku/bert-base-japanese'
tokenizer = BertJapaneseTokenizer.from_pretrained(model_name)
実際に分割例を見てみます。
# tokenizerの分割例
text = "カーネーションが綺麗だった"
tokenizer.tokenize(text)
Input Embedding
次に入力をみていきましょう。
入力に必要なのは、Token Embedding(input_id), Segment Embedding(segment_id), attention_maskです。
Positional Embeddingは内部でやってくれるので作成する必要はありません。
# pad_tokenとmax_lengthの設定
pad = tokenizer.vocab["[PAD]"]
max_lengths=512
# tokenをid化
token = ["[CLS]"]+tokenizer.tokenize(text)[:max_lengths-2]+["[SEP]"]
input_id = tokenizer.convert_tokens_to_ids(token)
# 1文のみなのでsegment_idは全て0
segment_id = [0]*max_lengths
# input_idが存在する箇所に1を立てる
attention_mask = [1]*len(input_id)+[0]*(max_lengths - len(input_id))
input_id = input_id+[pad]*(max_lengths-len(input_id))
print("text:",text)
print("token:",token)
print("input_id:",input_id[:15],"len:",len(input_id))
print("segment_id:",segment_id[:15],"len:",len(segment_id))
print("attention_mask:",attention_mask[:15],"len:",len(attention_mask))
Data Loader作成
上記のinput Embeddingを元に、Datasetクラスを作成します。
# 上記のinput_dataの作成方法をもとにdataset化
class ReviewDataset(torch.utils.data.Dataset):
    def __init__(self, texts, labels=[]):
        self.input_ids, self.segment_ids, self.attention_masks = [],[],[]
        for text in tqdm(texts):
          token = ["[CLS]"]+tokenizer.tokenize(text)[:max_lengths-2]+["[SEP]"]
          input_id = tokenizer.convert_tokens_to_ids(token)
          segment_id = [0]*max_lengths
          attention_mask = [1]*len(input_id)+[0]*(max_lengths - len(input_id))
          input_id = input_id+[pad]*(max_lengths-len(input_id))
          self.input_ids.append(input_id)
          self.segment_ids.append(segment_id)
          self.attention_masks.append(attention_mask)
        self.input_ids = np.array(self.input_ids)
        self.segment_ids = np.array(self.segment_ids)
        self.attention_masks = np.array(self.attention_masks)
        self.labels = labels

    def __len__(self):
        return len(self.input_ids)

    def __getitem__(self, idx):
      if len(self.labels):
        return self.input_ids[idx], self.segment_ids[idx], self.attention_masks[idx], self.labels[idx]
      else:
        return self.input_ids[idx], self.segment_ids[idx], self.attention_masks[idx]
上記クラスを使って、train_dataloaderとvalid_dataloaderを作成します。
# datasetとdataloaderの作成
from sklearn.model_selection import train_test_split
batch_size=8
X,y = train_df["text"].values, train_df["label"].values
X_train, X_val, y_train, y_val = train_test_split(X, y, test_size=0.3, random_state=100,stratify=y)
train_ds = ReviewDataset(texts=X_train, labels=y_train)
train_dl = torch.utils.data.DataLoader(
    train_ds, batch_size=batch_size, shuffle=True)
val_ds = ReviewDataset(texts=X_val, labels=y_val)
val_dl = torch.utils.data.DataLoader(
    val_ds, batch_size=batch_size, shuffle=False)
modelの作成
BERTの2値分類モデルを作成します。
[CLS]トークンの特徴量を用いて全結合で2つの値を出力します。
# Bertの事前学習済みエンコーダーを使用して2値クラス分類器を作成

class BertClassification(nn.Module):
  def __init__(self, bert):
      super(BertClassification, self).__init__()

      # BERTモジュール
      self.bert = bert  # BERTモデル

      self.cls = nn.Linear(in_features=768, out_features=2)

      # 重み初期化処理
      nn.init.normal_(self.cls.weight, std=0.02)
      nn.init.normal_(self.cls.bias, 0)

  def forward(self, input_ids, token_type_ids=None, attention_mask=None):

      # BERTの基本モデル部分の順伝搬
      # 順伝搬させる
    output = self.bert(
              input_ids, token_type_ids, attention_mask)
    # [CLS]に対応する特徴量を取得します。
    pooled_output = output[1]

    # 入力文章の1単語目[CLS]の特徴量を使用して、ポジ・ネガを分類します
    pooled_output = pooled_output.view(-1, 768)  # sizeを[batch_size, hidden_sizeに変換
    out = self.cls(pooled_output)

    return out
「pooled_output=output[1]」の部分がわかりづらいので解説すると、 bertの公式では以下のように記述されています。
A BaseModelOutputWithPoolingAndCrossAttentions (if return_dict=True is passed or when config.return_dict=True) or a tuple of torch.FloatTensor comprising various elements depending on the configuration (BertConfig) and inputs. last_hidden_state (torch.FloatTensor of shape (batch_size, sequence_length, hidden_size)) – Sequence of hidden-states at the output of the last layer of the model. pooler_output (torch.FloatTensor of shape (batch_size, hidden_size)) – Last layer hidden-state of the first token of the sequence (classification token) further processed by a Linear layer and a Tanh activation function. The Linear layer weights are trained from the next sentence prediction (classification) objective during pretraining.
つまり、bertのoutputは以下のようになっています。
output=(last_layerの全てのtoken,last_layerの最初のToken(=[CLS]Token))
ということで、output[1]は[CLS]Tokenの特徴量を抽出していることになるわけですね。
ちなみに、attentionを可視化したいとか、最終層以外の特徴量も取り出したい等あれば、そういうオプションもあるので、以下を参考にしてください。
公式ドキュメントOptimizer等の設定
次にOptimizerや、損失関数、gpuを使用するか等の設定を行います。
今回は、AdamとCross Entropyを使用します。
cuda = torch.cuda.is_available()
# 学習済みモデルをダウンロード
bert = BertModel.from_pretrained(model_name)
model =  BertClassification(bert)
# 高速化
torch.backends.cudnn.benchmark = True
if cuda:
  model.cuda()
# optimizerの設定
optimizer = optim.Adam(model.parameters(),lr = 4e-4 ,betas=(0.9, 0.999))

# 損失関数の設定
criterion = nn.CrossEntropyLoss()
また、今回は学習時間を短縮するため、最終層以外のパラメータを固定します。
実際のタスクでは、全てのパラメータを学習することも多いです。
# 最後以外のBertLayerモジュールのパラメータを固定(実際のタスクでは固定させないことも多い)
for param in model.bert.encoder.layer[:-1].parameters():
    param.requires_grad = False
学習
ここで学習フェーズです。
Pytorchは先ほど作ったdata_loaderを使って、for文でtrainingしていきます。
train, validともに1イテレーションごとに記述できるのが良いですね。
## 学習します。1epochあたり約8分です。
epochs = 2
for epoch in range(epochs):
  total_loss = 0
  accuracy = 0
  model.train()

  print("epoch {} start!".format(epoch+1))
  # train
  for iter_num, (input_ids, segment_ids, attention_masks, labels) in tqdm(enumerate(train_dl),total = len(train_dl)):
    optimizer.zero_grad()
    if cuda:
      input_ids, segment_ids, attention_masks, labels =\
      input_ids.cuda(), segment_ids.cuda(), attention_masks.cuda(), labels.cuda()
    # forward(順伝搬)
    outputs = model(input_ids = input_ids,
                    token_type_ids = segment_ids,
                    attention_mask = attention_masks)
    pred_proba = outputs.softmax(dim=1)[:,1]
    pred = (pred_proba>=0.5).type(torch.int)
    loss = criterion(outputs,labels)

    # backward(逆伝搬)
    loss.backward()
    optimizer.step()

    total_loss += loss.item()
    accuracy += (pred==labels).sum().item()
    #50 iterごとにlossとaccuracyを表示
    if (iter_num+1) % 50 == 0:
      size = batch_size*(iter_num+1)
      print("{} iter loss:{:.4f} accuracy:{:.4f}".format(
          iter_num+1,total_loss/(iter_num+1),accuracy/size))


  total_loss /= len(train_dl)
  accuracy /= len(train_ds)

  # validation
  val_total_loss = 0
  val_accuracy = 0
  model.eval()
  for input_ids, segment_ids, attention_masks, labels in tqdm(val_dl):
    if cuda:
      input_ids, segment_ids, attention_masks, labels =\
      input_ids.cuda(), segment_ids.cuda(), attention_masks.cuda(), labels.cuda()
    with torch.no_grad():
      outputs = model(input_ids = input_ids,
                      token_type_ids = segment_ids,
                      attention_mask = attention_masks)
      pred_proba = outputs.softmax(dim=1)[:,1]
      pred = (pred_proba>=0.5).type(torch.int)
      loss = criterion(outputs,labels)
      val_total_loss += loss.item()
      val_accuracy += (pred==labels).sum().item()

  val_total_loss /= len(val_dl)
  val_accuracy /= len(val_ds)
  print("epoch{} total loss:{:.4f}, accuracy:{:.4f}, val_total loss:{:.4f}, val_accuracy:{:.4f}"\
        .format(epoch+1,total_loss,accuracy,val_total_loss,val_accuracy))
torch.save(model.state_dict(), './model.hdf5')
予測
最後に、本当にできたか予測してみましょう。
まずは出来上がったモデルをロードします。
model.load_state_dict(torch.load("./model.hdf5"))実際に予測してみます。
"今日のランチは最高だった!"を予測してみます。
X_test = ["今日のランチは最高だった!"]
test_ds = ReviewDataset(texts=X_test)
test_dl = torch.utils.data.DataLoader(
    test_ds, batch_size=1, shuffle=False)
for input_ids, segment_ids, attention_masks in test_dl:
  if cuda:
    input_ids, segment_ids, attention_masks =\
      input_ids.cuda(), segment_ids.cuda(), attention_masks.cuda()
  outputs = model(input_ids = input_ids,
                  token_type_ids = segment_ids,
                  attention_mask = attention_masks)
  pred_proba = outputs.softmax(dim=1)[:,1]
  print("入力テキストのポジティブ度: {:.4f}".format(pred_proba.item()))
もう一つ予測してみましょう。
"今日のランチは微妙だった。"を予測してみます。
X_test = ["今日のランチは微妙だった。"]
test_ds = ReviewDataset(texts=X_test)
test_dl = torch.utils.data.DataLoader(
    test_ds, batch_size=1, shuffle=False)
for input_ids, segment_ids, attention_masks in test_dl:
  if cuda:
    input_ids, segment_ids, attention_masks =\
      input_ids.cuda(), segment_ids.cuda(), attention_masks.cuda()
  outputs = model(input_ids = input_ids,
                  token_type_ids = segment_ids,
                  attention_mask = attention_masks)
  pred_proba = outputs.softmax(dim=1)[:,1]
  print("入力テキストのポジティブ度: {:.4f}".format(pred_proba.item()))

うまく予想できてそうですね。
まとめ
今回は実際のコードを紹介しました。
BERTはoutput layerを変えるだけでclassificationだけでなく、 さまざまなタスクが実行可能なのでぜひ試してみてください!
参考文献
- つくりながら学ぶ! PyTorchによる発展ディープラーニング 小川雄太郎 著